Wear safety goggles when installing bungee and hardware. DO NOT let go of bungee rope under tension. An eye injury or other bodily injury could occur.
Loop bungee ball through our Web Lash fastening system. See the illustration.
Attach the bungee ball to the bottom rail, being sure to space them evenly between bows or where the bow meets the rail.
The Web Lash takes the place of grommets and allows you the flexibility to install your hardware wherever you like.
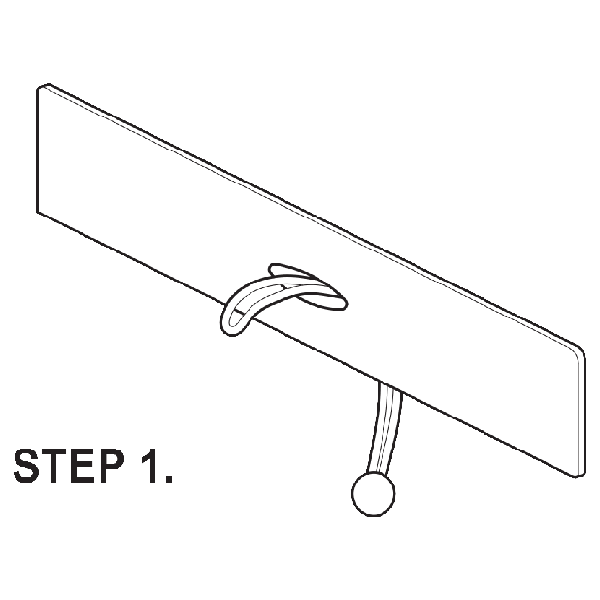
Step 1: Insert bungee through the Web Lash slot.
Begin by passing one end of the bungee cord through the opening of the Web Lash strap. Make sure the cord is inserted fully so it can loop securely through the slot.
Step 2: Pull bungee ball through to form a loop.
Once the bungee is threaded, pull the ball end of the cord through the created loop. This will start forming the secure wrap that will hold tension when installed on the rail.
Step 3: Secure the ball against the bottom rail.
Position the ball so it rests firmly against the underside of the bottom rail. This ensures that the tension from the bungee cord keeps the canopy cover tight and in place.
Step 4: Wrap the bungee and lock it in place as shown.
Bring the remaining length of the bungee around the rail and hook or loop it back through the Web Lash. Make sure the cord is snug and locked, ensuring a tight, secure fit that holds the canopy material evenly.